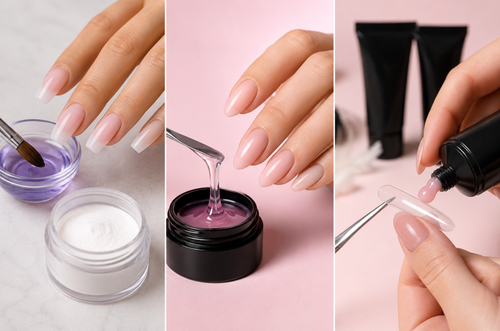
What do you need to apply gel polish?
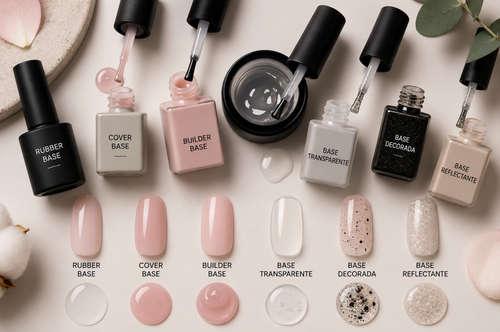
Before applying gel polish, make sure you have the essential products and tools: a compatible base coat, your chosen gel polish color, a top coat to finish the manicure, and a compatible UV/LED lamp to cure each layer.
You will also need standard nail preparation tools, such as a nail file, buffer, cuticle pusher, and a suitable nail cleanser or degreaser to prepare the natural nail plate before application.
How to apply gel polish step by step
Gel polish application generally follows a specific sequence: nail preparation, base coat, color, and top coat. Each product should be applied according to the manufacturer's instructions and properly cured in a compatible UV/LED lamp.
1. Properly prepare the nails
Proper preparation of the natural nail plate is an important part of achieving good adhesion and long-lasting wear.
Start by shaping the nails with a file. Carefully prepare the cuticle area and remove any residue that could interfere with product adhesion. If required by the system you are using, gently remove the surface shine with an appropriate buffer, taking care not to over-file the natural nail.
Finally, clean and degrease the nail plate with a suitable product. The nail should be clean and properly prepared before applying the base coat.
2. Apply the base coat
Apply the base coat in a thin, even layer, avoiding contact with the skin and cuticles.
Depending on the formula, a base coat can promote adhesion between the natural nail and subsequent layers and may also provide leveling or strengthening properties.
Cure the base coat in a compatible UV/LED lamp for the time specified by the manufacturer.
3. Apply the color
Apply the gel polish in thin, even coats, avoiding excess product around the cuticles and sidewalls.
The number of coats required depends on the pigmentation, coverage, and desired effect of the gel polish. Many colors require two coats, while more translucent shades may require a different application to achieve the desired result.
Each coat should be cured separately in a UV/LED lamp for the time recommended by the manufacturer.
4. Cure the product in a UV/LED lamp
Unlike traditional nail polish, gel polish does not simply air-dry. It needs to be cured in a compatible UV/LED lamp.
Curing time varies depending on the product formulation, the lamp being used, and the manufacturer's recommendations. There is no single curing time that is appropriate for every gel polish.
Always follow the instructions for the specific system you are using. Inadequate curing can affect both the performance and safety of the product.
5. Apply the top coat
After curing the final color coat, apply a thin, even layer of top coat over the entire nail surface.
When recommended for the product and application technique, seal the free edge of the nail as well. Cure the top coat in a compatible UV/LED lamp for the manufacturer's specified time.
Some top coats leave a tacky or inhibition layer after curing. This should be removed with an appropriate cleanser when required. No-wipe top coats do not require this step.
Common mistakes when applying gel polish
One of the most common mistakes is applying layers that are too thick. Excessive product can interfere with proper curing and negatively affect the performance and wear of the manicure.
Another common mistake is allowing uncured gel polish to come into contact with the skin or cuticles. In addition to contributing to lifting, skin contact with uncured gel products should be avoided. If product gets onto the skin during application, carefully remove it before curing.
Reducing the recommended curing time is another mistake. Always use a compatible UV/LED lamp and follow the curing time specified by the manufacturer for each product.
The tacky layer that remains after curing some gel products is known as the inhibition layer and does not automatically indicate inadequate curing. It is generally left in place between coats unless the manufacturer instructs otherwise.
How to make gel polish last longer
The durability of a gel manicure depends on several factors, including nail preparation, product compatibility, application technique, and proper curing.
Applying thin, even layers, keeping the product away from the skin and cuticles, and following the recommended curing times can help reduce lifting and chipping.
When recommended for the product and technique, carefully sealing the free edge can also contribute to a neat and durable finish.
For everyday care, avoid using your nails as tools, wear gloves during household tasks involving prolonged exposure to water or cleaning products, and regularly apply cuticle oil.
How to achieve a professional finish
A professional-looking finish depends on precision throughout the application process: careful preparation of the natural nail plate, an even base coat, thin layers of color, and proper top coat application.
It is also important to keep the product away from the skin and cuticles, maintain an even application, and follow the recommended curing times.
Using a compatible base coat, gel polish, and top coat and following the manufacturer's application protocol can help produce a more consistent and predictable result.
Frequently Asked Questions
How many coats of gel polish should be applied?
It depends on the pigmentation, coverage, and desired effect. Two thin color coats are common, but some products may provide the desired coverage in one coat, while translucent shades may require a different application. Always follow the manufacturer's recommendations.
How long should gel polish cure?
Curing time depends on the product and the UV/LED lamp being used. Always follow the curing time specified by the manufacturer.
Why does gel polish lift or chip?
Several factors can contribute to lifting or chipping, including inadequate nail preparation, product contact with the skin or cuticles, incompatible products, incorrect application, or inadequate curing.
Do I need to apply a base coat before gel polish?
In a traditional three-step gel polish system, yes. The base coat is applied before the color. However, always follow the application protocol for the specific system you are using.
Why is gel polish sticky after curing under the lamp?
Many gel products leave a sticky inhibition layer after curing. This is normal and does not, by itself, mean that the product has been inadequately cured. The inhibition layer is generally not removed between coats. If the top coat leaves an inhibition layer, it is removed after the final cure; a no-wipe top coat does not require cleansing.